Embroidery Hoops: Sizes, Types, and How to Hoop Fabric Drum-Tight
How wooden, bamboo, plastic, and spring-tension hoops differ, which hoop size suits which design, and a step-by-step method for getting fabric drum-tight without hoop marks.
A hoop has one job: to hold the fabric flat and firm so every stitch sits at the same tension. When the fabric is loose, stitches pull it into puckers that no amount of pressing fully removes. Choosing a sensible size and hooping carefully solves most of that before the first stitch.
The Parts of a Hoop
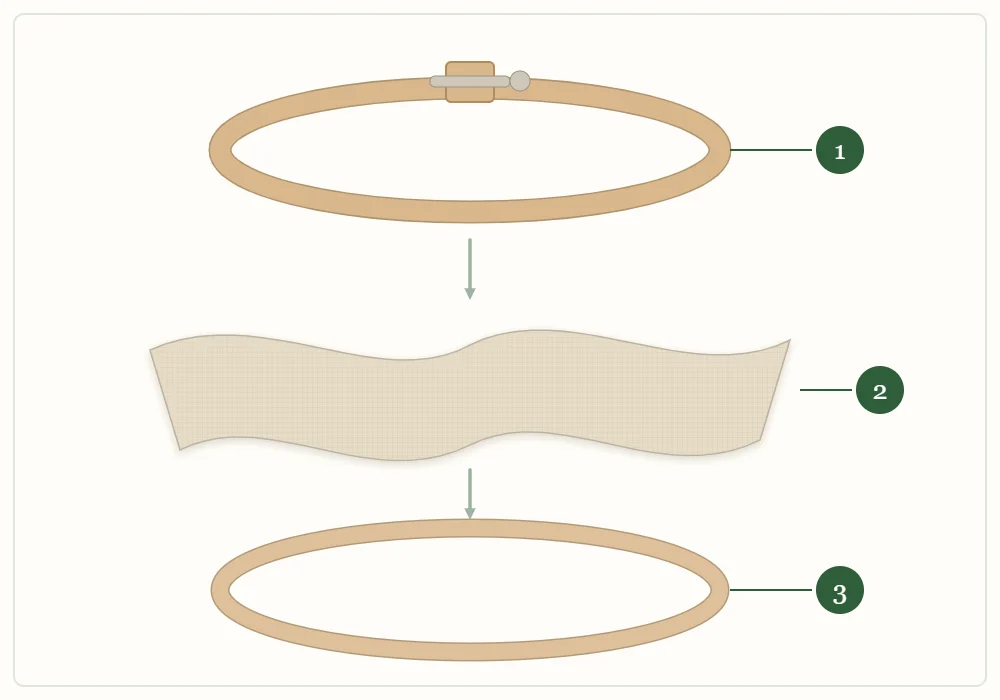
A standard hoop is two rings. The inner ring (part 3) is a closed circle. The outer ring (part 1) is split, with a screw across the gap that tightens or loosens it. The fabric (part 2) is trapped between them, and the screw sets how hard the rings grip.
Types of Hoops
- Wooden hoops, often beech or birch, are smooth and rigid, and their metal hardware holds tension well. They also look good enough to serve as the frame for the finished piece.
- Bamboo hoops are light and inexpensive, which makes them a common first hoop. Quality varies. Check that the two rings sit flush all the way around with no visible gap, and that the surface is smooth enough not to snag the fabric.
- Plastic hoops are sturdy and washable. Many have a small ridge on the inner ring that locks into a groove in the outer ring, which grips slippery fabric well. They are practical for stitching but are less often used for display.
- Spring-tension hoops have a metal inner ring with two handles that you squeeze to snap it into a grooved outer ring. They are quick to put on and take off. The handles can get in the way of the thread, and the tension cannot be fine-tuned.
For a first hoop, a wooden or good bamboo screw hoop is the simplest choice.
Which Size to Use
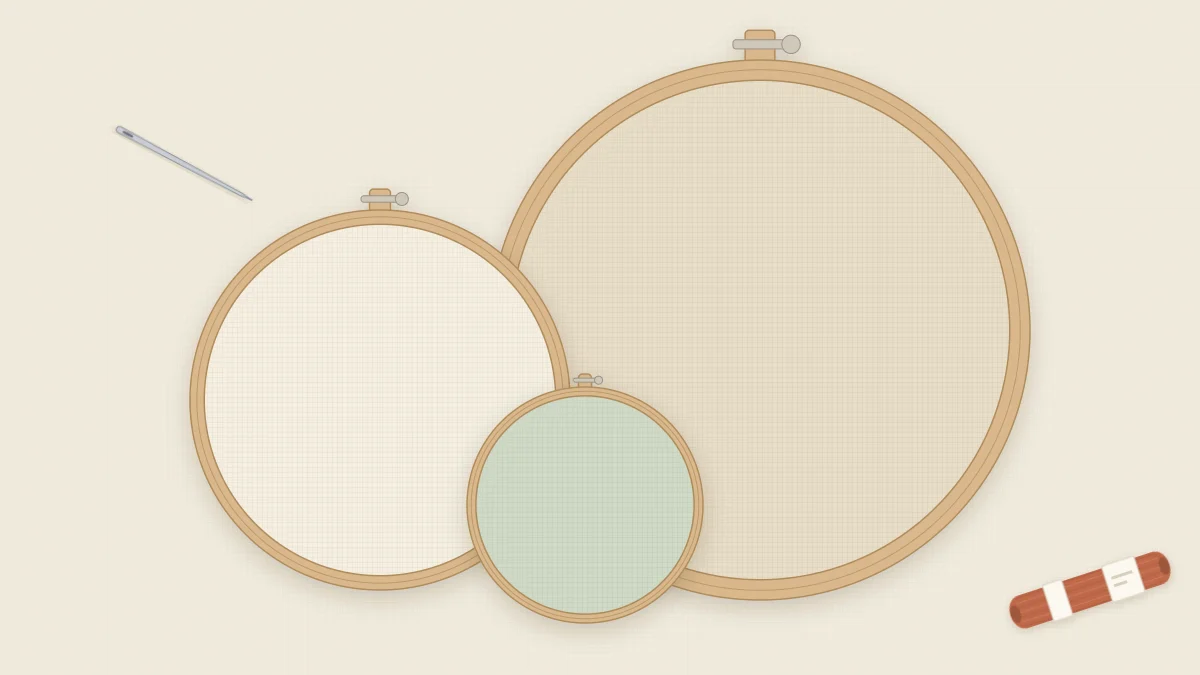
Hoops are measured across the inner ring. The design should sit comfortably inside it with a clear margin, both for looks and because stitching right next to the ring is awkward.
| Hoop size | Comfortable design size | Typical use |
|---|---|---|
| 3 in (7.5 cm) | Up to about 2 in (5 cm) | Single small motifs, ornaments, gifts |
| 4 in (10 cm) | Up to about 3 in (7.5 cm) | First projects, simple sprigs and shapes |
| 5 in (13 cm) | Up to about 4 in (10 cm) | Most beginner patterns, small bouquets |
| 6 in (15 cm) | Up to about 5 in (13 cm) | Wreaths, designs with lettering in the center |
| 8 in (20 cm) | Up to about 6.5 in (16.5 cm) | Larger pieces, or as a working hoop moved around a big design |
Small hoops are easiest to hold, since your fingers can reach the middle from the edge. That is why a design as small as the tiny bee is worked in a 3-inch hoop, while the wildflower wreath needs a 6-inch hoop to leave room around the ring of leaves. A hoop in the 4-inch to 6-inch range is comfortable for most hands.
How to Hoop Fabric Drum-Tight
- Press the fabric. Creases that go into the hoop tend to stay there.
- Loosen the screw until the outer ring slips off easily, and separate the rings.
- Lay the inner ring on a table and center the fabric over it, design facing up. Keep the fabric threads running straight across and straight down.
- Press the outer ring down over the fabric and inner ring, with the screw at the top. Push it down evenly until both rings are level.
- Tighten the screw partway, just enough that the fabric holds but can still slide.
- Pull the fabric taut at the top, bottom, left, and right, a little at a time, working around the hoop twice.
- Tighten the screw fully. A screwdriver in the slot of the screw gives a firmer final turn than fingers alone.
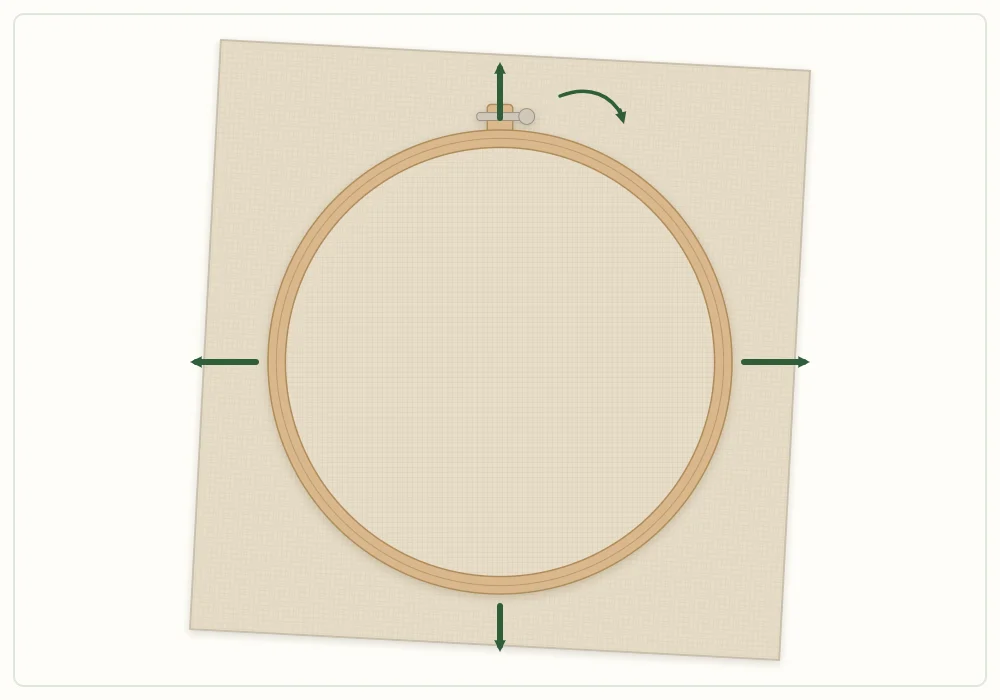
Tap the surface. It should feel firm and sound a little like a drum. If it gives under a fingertip, loosen slightly, pull again, and retighten.
Watch out
Pull only at the four points shown, in line with the threads of the weave. Tugging on the diagonal stretches the fabric out of shape, and the design will look distorted when it comes out of the hoop.
Fabric relaxes as you work. Expect to pull it taut and give the screw another small turn once or twice in a session.
Binding the Inner Ring
If a fabric keeps slipping, or is fine enough to mark easily, wrap the inner ring with cotton twill tape. The wrapped surface grips better and cushions the fabric.
- Hold the end of a narrow cotton tape against the inside of the inner ring.
- Wrap the tape around the ring at a slight angle, overlapping each turn by about half its width and keeping it flat and snug.
- When you return to the start, trim the tape and secure the end with a few small stitches on the inside of the ring.
The binding makes the inner ring slightly thicker, so loosen the screw a little more than usual when hooping. It stays on the hoop permanently.
Avoiding Hoop Marks
A hoop left on fabric presses a ring-shaped crease into it, and sometimes a line of dirt as well. A few habits prevent this:
- Take the fabric out of the hoop when you finish for the day.
- Use a hoop larger than the design, so any mark falls outside the stitching and ends up hidden at the back.
- Stitch with clean hands, since the edge of the hoop is where fabric gets handled most.
- If a crease remains at the end, dampen the piece and press it face down on a folded towel.
Fabric choice matters here too. Linen and cotton release creases with water and heat, while some other fabrics hold them. The embroidery fabric guide compares the options.
Moving the Hoop on a Larger Piece
When a design is bigger than the hoop, or runs along an edge like the simple border patterns, you work one area and then shift the hoop to the next.
- Finish all the stitching inside the current area before moving on.
- Loosen the screw generously before seating the hoop over stitched areas, so the rings do not scrape the thread.
- Try to position the rings on flat stitches or bare fabric. Raised stitches such as French knots and woven wheels flatten under pressure, so stitch those last where you can.
- Overlap the new position with the finished area by a little, so the tension stays consistent across the join.
Tip
For a hoop that will also be the frame, position the screw exactly above the top center of the design before the final tightening. It becomes the hanging point.
When the stitching is complete, the same hoop can display it. The steps for trimming, gathering, and backing the fabric are in how to finish the back of an embroidery hoop.
Frequently asked questions
What size embroidery hoop is best for beginners?
A 4-inch or 5-inch (10 or 13 cm) hoop. It is easy to hold, your fingers can reach the middle, and it fits most beginner patterns.
How tight should fabric be in an embroidery hoop?
Firm enough that it does not give under a fingertip and sounds a little like a drum when tapped. Pull it taut at the top, bottom, left, and right before the final tightening of the screw.
How do I stop fabric slipping in the hoop?
Bind the inner ring with narrow cotton twill tape. The wrapped surface grips the fabric better and cushions it.
How do I avoid hoop marks?
Take the fabric out of the hoop between sessions and use a hoop larger than the design. A remaining crease on cotton or linen usually comes out when the piece is dampened and pressed face down on a towel.