How to Finish the Back of an Embroidery Hoop
How to wash, press, and re-hoop a finished embroidery, gather the fabric neatly behind the hoop, and add a felt backing, with a no-sew option and its trade-offs.
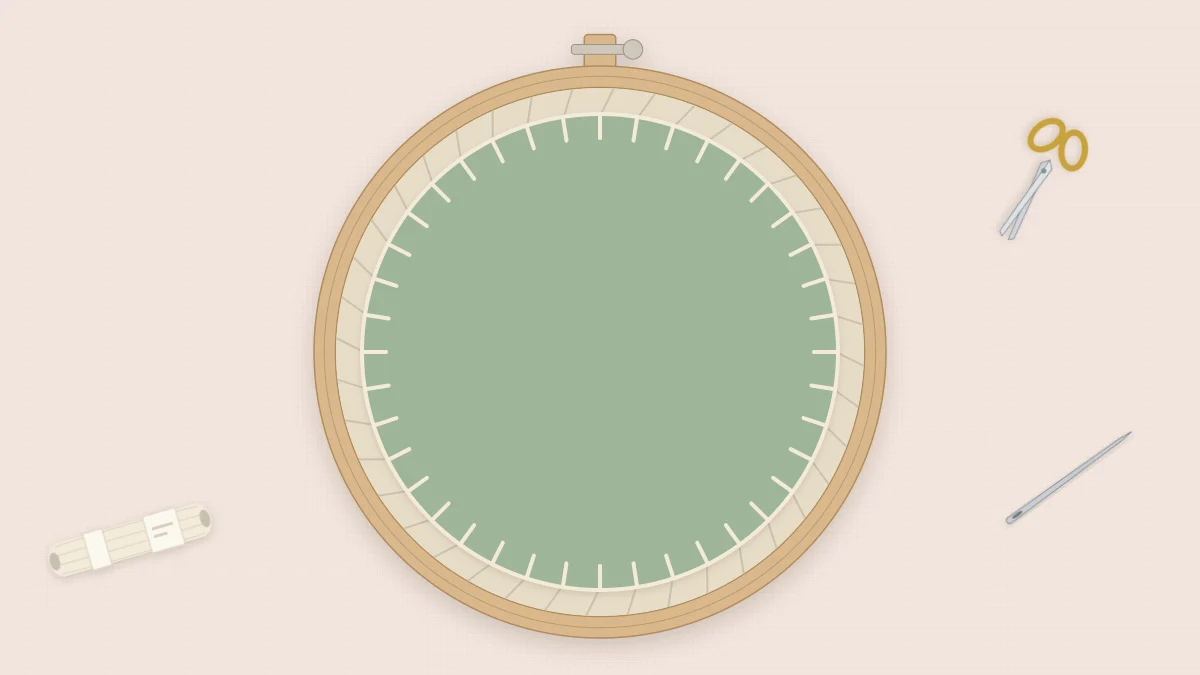
The back of a hoop decides how the front looks on the wall. Loose fabric behind the rings lets the front sag over time, and a ragged edge peeking past the wood spoils the outline of the circle. Closing the back takes less than an hour, needs nothing more than thread, scissors, and optionally a piece of felt, and can be undone later if you ever want to re-stretch the piece.
Before You Close the Back
Wash out the transfer marks
Take the embroidery out of the hoop. If you used a water-soluble pen or stick-on stabilizer, rinse the piece in cool water until every trace is gone, then roll it in a clean towel to blot it. Do this before any ironing, because heat can set some marking inks permanently. The guide to transferring embroidery patterns lists which marking tools wash out and which do not.
Press face down
Lay a folded towel on the ironing board, place the damp embroidery face down on it, and press from the back. The stitches sink into the towel instead of being flattened, and the hoop crease around the design relaxes. Let the fabric dry completely.
Re-hoop and center
Put the piece back in the hoop you will display it in. Position the screw at the top, check that the design sits in the middle and that the fabric grain runs straight, then tighten the screw in stages, pulling the fabric gently on opposite sides until it is taut like a drum skin. If you are still choosing a display hoop, the embroidery hoop guide compares the common types.
What You Need
- Sharp fabric scissors
- A needle and strong sewing thread, or 3 strands of floss, about 30 in (75 cm) long
- Optional: a piece of felt slightly larger than the hoop, a pencil, and floss to match the felt
- For the no-sew method only: fabric or craft glue
The Gathered Back, Step by Step
This is the standard method. It holds the fabric firmly and can be reversed by snipping one thread.
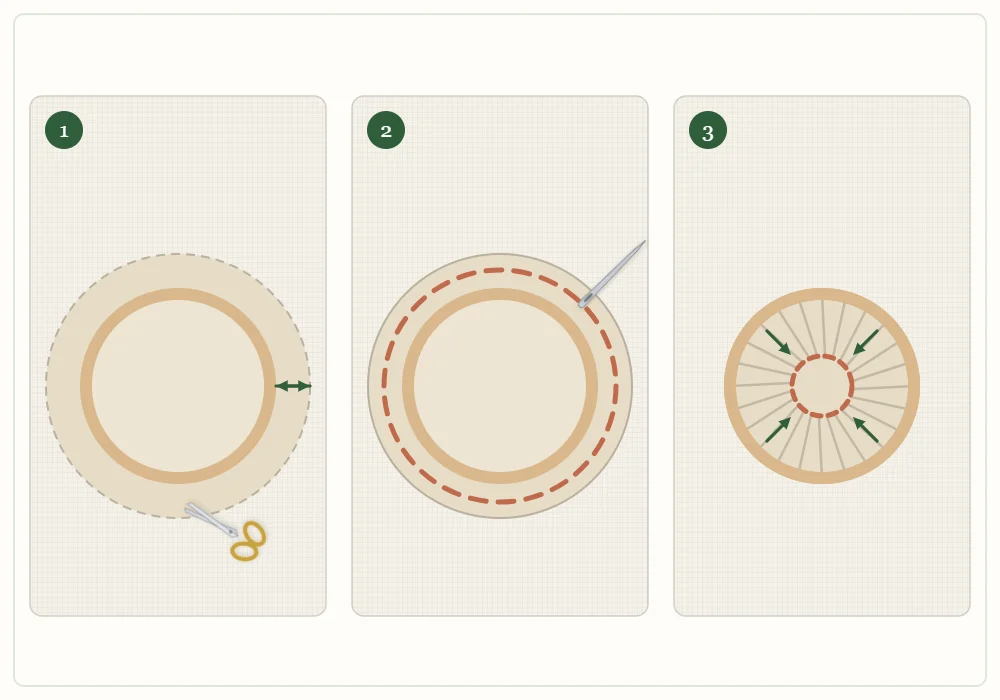
- Trim to a circle. Turn the hoop face down. Cut the fabric into a circle that leaves an even margin of about 1.5 in (4 cm) beyond the hoop all the way around. For a hoop of 3 in (8 cm) or smaller, 1 in (2.5 cm) is enough; the margin only needs to fold over the inner ring without the edges overlapping in a thick pile at the center.
- Work a running stitch around the margin. Knot the thread and start near the screw. Sew a running stitch about 1/4 in (6 mm) long, placed roughly 1/2 in (12 mm) in from the cut edge, all the way around. Use a single unbroken length of thread; a join in the middle tends to give way when you pull.
- Gather. When you are back at the start, pull both ends of the thread gently. The margin folds over the inner ring and draws in toward the center of the back. Spread the gathers evenly with your fingers.
- Secure. Tie the two ends together with a double knot, or take three small stitches on top of each other in the gathered fabric, and trim the tails.
Tip
Check the front once more before you tie off. Gathering pulls evenly on the fabric, but if the design has shifted, loosen the screw a little, nudge the fabric back into place, and retighten.
A gathered back is a complete finish. If the piece will hang against a wall and nobody will see behind it, you can stop here.
Adding a Felt Backing
A felt circle hides the gathers and the back of the stitching, which matters for gifts and for pieces that will be handled.
- Before you re-hoop, or using a spare hoop of the same size, trace around the outside of the inner ring onto the felt. For a hoop already assembled, trace around the outer ring and cut about 1/4 in (6 mm) inside the line.
- Cut out the circle and lay it on the gathered back. It should cover the gathers and sit just inside the wooden edge without showing from the front.
- Thread a needle with 2 or 3 strands of floss. Hide the knot under the felt.
- Sew the felt to the folded edge of the gathered fabric all the way around, catching only the fabric, never the wood.
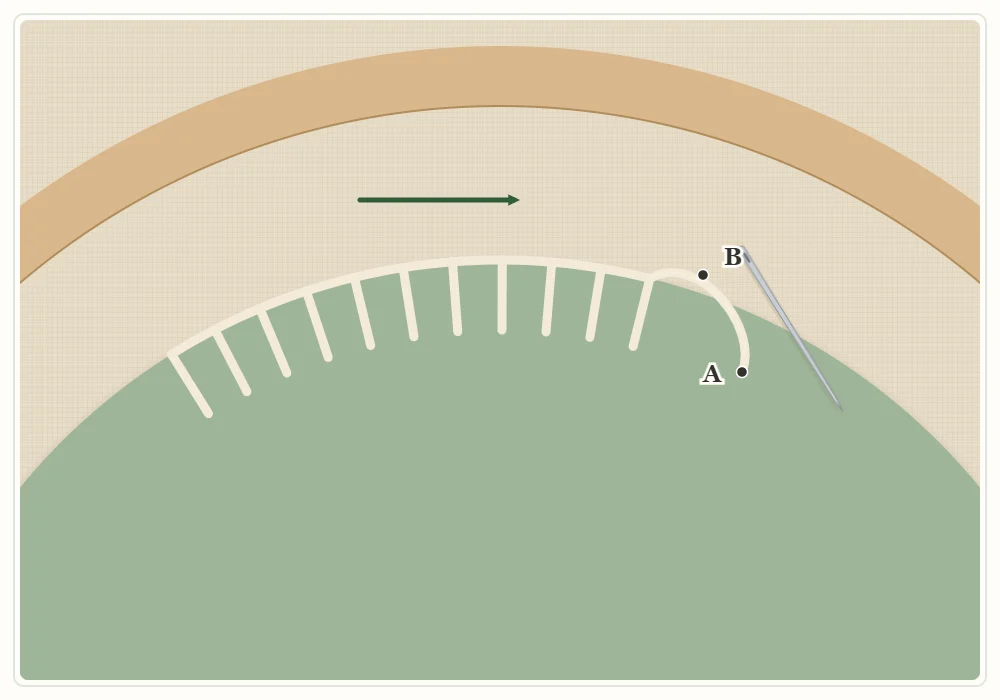
Two stitches work well. Whip stitch is the quickest: bring the needle up through the felt near its edge, pick up a little of the gathered fabric just beyond the edge, and repeat, making small slanted stitches over the edge. Blanket stitch takes a little longer and leaves a tidy line of thread along the rim of the felt: come up through the felt at A, take the needle through the gathered fabric and out at the felt edge at B, and pass the needle over the working thread before pulling through, so each stitch locks the loop of the one before.
The No-Sew Alternative
You can glue the margin down instead of gathering it. Trim the fabric to about 1/2 in (12 mm) beyond the hoop, run a thin line of glue along the inside face of the inner ring only, and press the margin down onto it a section at a time. Let it dry fully before hanging.
Watch out
Keep glue on the inner ring only. Glue that reaches the stretched fabric can soak through and leave a mark on the front that will not wash out.
Gluing is fast and lies very flat. The trade-off is that it is permanent: you cannot re-tension the fabric if it slackens, take the piece out to wash it, or move it to a frame later, and some glues may discolor with age. For a piece you care about, sewing is the safer choice.
Methods Compared
| Method | Rough time | Reversible | Best for |
|---|---|---|---|
| Gathered with running stitch | 15 to 20 minutes | Yes | Everyday wall pieces |
| Gathered plus felt backing | 40 to 60 minutes | Yes | Gifts, ornaments, pieces seen from behind |
| Glued margin | 10 minutes plus drying | No | Quick decorations you do not plan to keep for years |
| Framed without a hoop | Varies with the frame | Yes, if laced or pinned | Larger or rectangular designs |
Hanging the Hoop
The simplest way is to rest the gap under the screw on a small nail or a removable wall hook, so the hoop hangs with the screw at the top. For a softer look, thread a length of ribbon or twine through the screw hardware and tie it in a loop. Light hoops can also stand on a shelf, leaning against the wall.
Keep finished pieces out of strong direct sunlight, which fades floss and fabric over time.
Finishing Without a Hoop
A hoop is not the only option. To frame a piece, cut a board of acid-free card or foam board to fit the frame, center the pressed embroidery over it, fold the margins to the back, and hold them with long lacing stitches running from one side to the opposite side, pulled snug. Frame it without glass, or with spacers so the glass does not press on raised stitches such as French knots.
Planning the finish before you start makes this easier: cutting the fabric generously is part of the advice in the embroidery fabric guide, and a small design such as the easy leaf sprig is a low-pressure piece to practice your first gathered back on.
Frequently asked questions
How much fabric should I leave around the hoop?
Trim to an even margin of about 1.5 in (4 cm) beyond the hoop. For hoops of 3 in (8 cm) or smaller, about 1 in (2.5 cm) is enough.
Do I have to add felt to the back?
No. A gathered back is a complete finish for a piece that hangs against a wall. Felt simply hides the gathers and the back of the stitching, which is nice for gifts.
Is it okay to glue the fabric to the hoop?
It works and it is fast, but it is permanent. You cannot re-tension, wash, or reframe a glued piece, so sewing is the safer choice for work you want to keep.
Should I wash my embroidery before finishing it?
Rinse out any water-soluble transfer marks in cool water first, and do it before ironing, because heat can set some marking inks. Then press the piece face down on a towel.