How to Embroider on Clothing: T-Shirts, Denim, and Knits
What changes when you stitch on something you will wear and wash: stabilizer for knits, the right needle, short durable stitches, secure ends, and good placement.
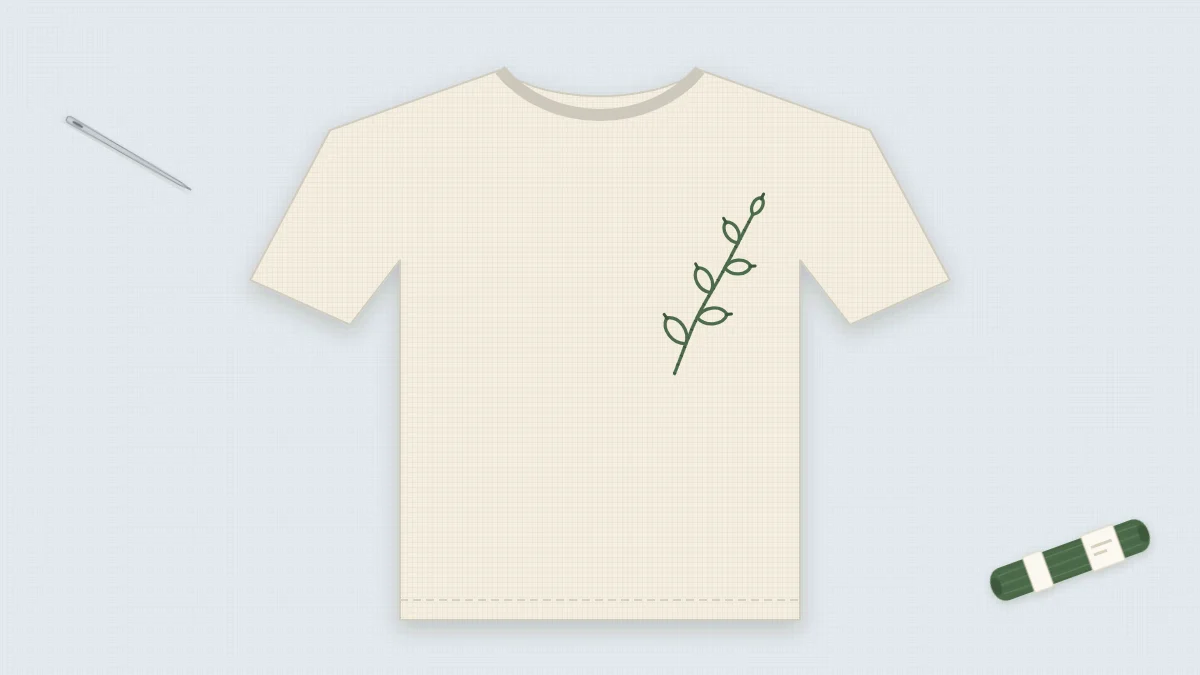
Clothing behaves differently from fabric stretched in a display hoop. It stretches, it rubs against skin, and it goes through the wash, so the choices that matter most are made before the first stitch: a small design, the right support behind the fabric, and stitches short enough to survive wear. Get those three right and a plain T-shirt or denim jacket is no harder to stitch than a practice square.
Choosing the Garment and the Design Size
Wash and dry the garment first so any shrinking happens before you stitch. For a first attempt, choose something stable: a woven cotton shirt, a denim jacket, or a tote bag. T-shirts and sweatshirts are perfectly possible, but the stretch adds one extra step.
Keep the design small. Motifs between 1 and 3 in (2.5 to 8 cm) across sit well on clothing, move with the fabric, and fit inside a 4-inch (10 cm) hoop without re-hooping. Large, densely filled designs make a stiff patch that pulls on soft fabric. Open line designs are the most comfortable to wear, and the mini embroidery motifs are sized for exactly this kind of use.
Fabric, Needle, and Stabilizer at a Glance
| Garment fabric | Needle | Stabilizer | Notes |
|---|---|---|---|
| T-shirt jersey and other stretch knits | Ballpoint | Iron-on or stick-on behind the fabric; water-soluble on top if needed | Never stretch the fabric in the hoop |
| Sweatshirt fleece | Ballpoint | Iron-on behind; water-soluble on top keeps stitches from sinking | Use 3 strands so lines stay visible |
| Woven cotton or linen shirts | Sharp embroidery needle | Usually none | Treat like ordinary hoop fabric |
| Denim | Sharp embroidery needle, sturdy enough for thick cloth | None for rigid denim; iron-on behind stretch denim | A hoop may not close over seams; stitch in hand there |
Why Knits Need Stabilizer
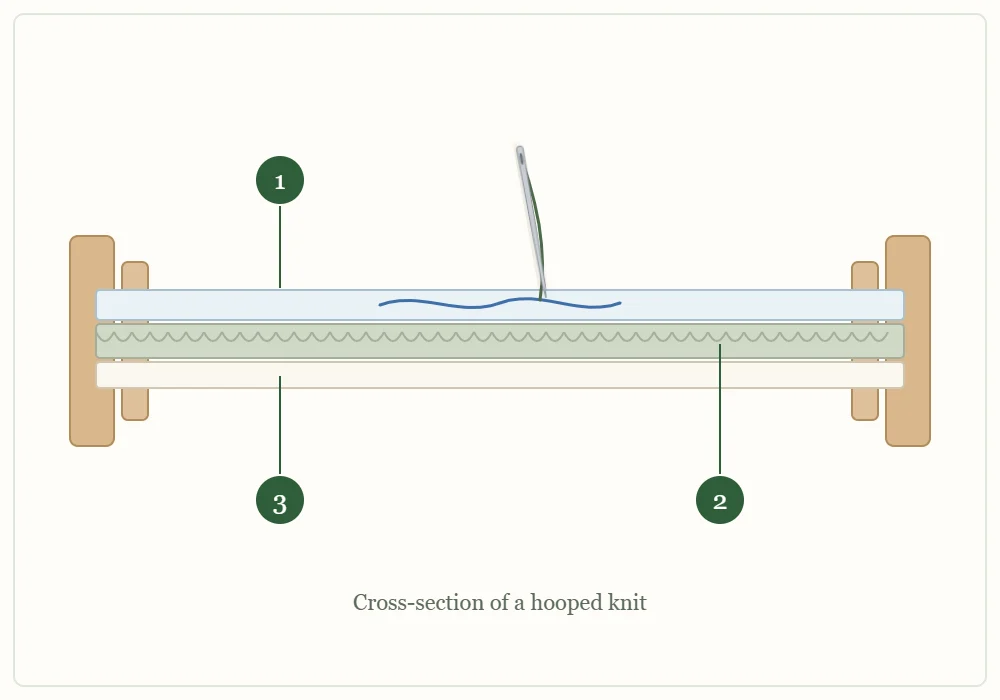
Knit fabric is made of loops, so it stretches in every direction. Embroidery floss does not. If you stitch on bare jersey, the fabric gives while you work and springs back afterward, leaving puckers around the design, and a taut line of stitching can pop when the shirt is pulled on. Stabilizer temporarily turns the stitching area into something that behaves like a woven fabric.
There are two places to put it:
- Behind the fabric. A piece of iron-on or stick-on stabilizer on the inside of the garment, cut a little larger than the design, stops the knit from stretching while you stitch. Tear-away and cut-away types are trimmed close to the stitching afterward.
- On top of the fabric. Water-soluble stabilizer carries the design, so there is no need to draw on a stretchy surface, and it keeps stitches from sinking into fleece or ribbing. It rinses away when you are done.
On a thin T-shirt, using both gives the cleanest result. The guide to transferring embroidery patterns explains how to draw or print a design onto water-soluble stabilizer.
Hooping Without Stretching
Lay the garment flat, slide the inner ring inside it under the design area, and press the outer ring down over the top. The fabric should be smooth and flat, not drum-tight. On a knit, do not tug the edges after the hoop is closed: every bit of stretch you add now turns into a pucker when the hoop comes off.
Watch out
Check before each session that you have hooped only one layer. It is easy to stitch the front of a T-shirt to the back, or a sleeve closed. Keep your free hand inside the garment so you can feel the needle come through.
Needles: Ballpoint for Knits, Sharp for Wovens
A ballpoint needle has a slightly rounded tip that slips between the loops of a knit instead of piercing them. A sharp point can cut a loop, and on fine jersey a cut loop may grow into a small hole after washing. Woven fabrics and denim are the opposite case: a sharp embroidery needle parts the tight weave cleanly, and denim needs one sturdy enough not to bend. In both cases, choose an eye large enough for the floss to pass without fraying.
Stitches That Survive Washing
Short stitches wear best because there is little loose thread to catch. Reliable choices are backstitch, split stitch, chain stitch, stem stitch, and French knots, all covered in the guide to basic embroidery stitches. Keep each stitch at about 1/8 in (3 mm).
Avoid long satin stitches. A satin stitch that spans more than about 1/4 in (6 mm) lies loose on the surface, snags on jewelry and zippers, and shifts in the wash. To fill a shape, use rows of split stitch or chain stitch packed side by side, or break a wide area into narrow sections.
Two or three strands of six-strand cotton floss suit most garments. The embroidery thread guide covers how strand count changes the weight of a line.
Securing Thread Ends
Clothing is pulled, stretched, and tumbled, so ends need more holding than they do in hoop art. Start with a small knot on the inside, then take a tiny stitch over it within the design area to lock it. To finish, weave the thread under the backs of four or five stitches, loop back under the last two, and trim, leaving a short tail instead of cutting flush. Do not carry thread across gaps between separate parts of the design; long strands on the inside catch on fingers and buttons.
Covering the Back
The back of embroidery can feel scratchy against skin, especially on a T-shirt. Once the stitching is done and any stabilizer has been removed or trimmed, cut a piece of soft iron-on backing a little larger than the design, round its corners so they are less likely to lift, and fuse it over the back following the product’s instructions. It also protects the thread ends from rubbing loose.
Where Designs Sit Well
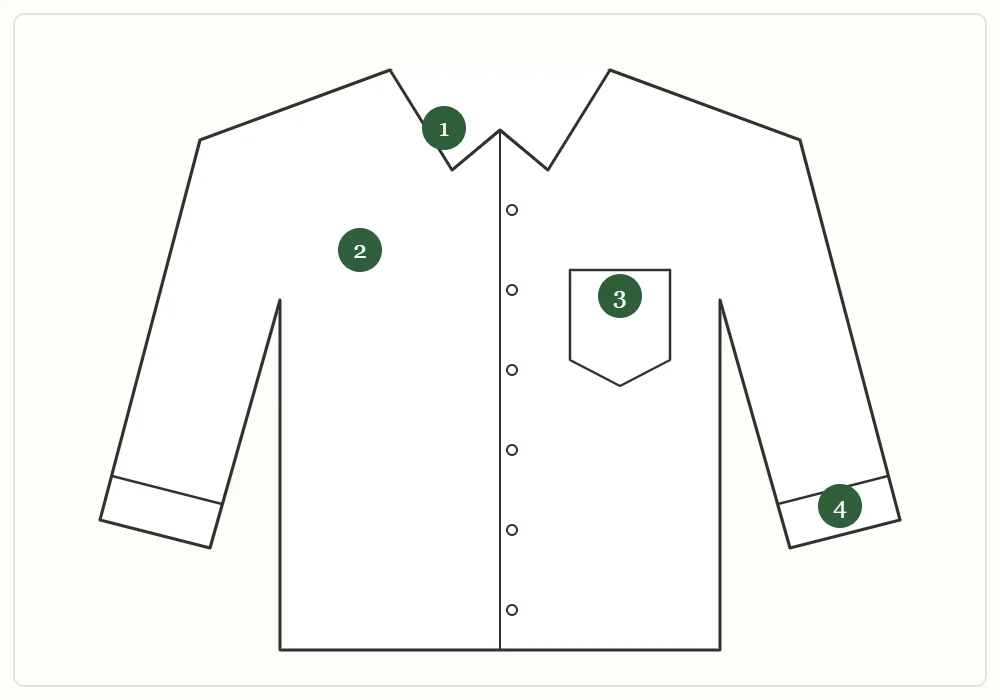
- Collar point. A tiny motif angled into the point. Stitch through the top layer only if you can, so the underside stays clean.
- Left chest. The classic spot. Try the garment on and mark the position while wearing it; a design placed on a flat shirt often ends up lower or closer to the armhole than expected.
- Pocket edge. A sprig that seems to grow out of the pocket. Slip a piece of card inside the pocket so you do not sew it shut.
- Cuff. A short border or a single motif near the button. Cuffs are thick, so stitch in hand without a hoop.
Tip
A single branch from the easy leaf sprig pattern, scaled to about 2 in (5 cm), makes a forgiving first design for the left chest: it is all short stitches and has no fill.
Washing Embroidered Clothing
Rinse out water-soluble stabilizer and pen marks in cool water before the first proper wash. After that, turn the garment inside out, use a gentle cycle with cool water, and let it air dry when you can. A mesh laundry bag adds protection for pieces with French knots. To iron, turn the garment inside out and press the embroidered area face down on a towel.
Frequently asked questions
Do I need stabilizer to hand embroider a T-shirt?
Yes, for stretch knits it makes a clear difference. Stabilizer behind the fabric stops the knit from stretching as you stitch, which prevents puckers when the hoop comes off.
What needle should I use for knit fabric?
Use a ballpoint needle, which slips between the loops of the knit instead of cutting them. For woven fabric and denim, use a sharp embroidery needle.
Which stitches hold up best in the wash?
Short stitches such as backstitch, split stitch, chain stitch, stem stitch, and French knots. Avoid long satin stitches, which snag and shift.
How do I stop the back of the embroidery from scratching?
Fuse a piece of soft iron-on backing over the back of the finished stitching. It covers the thread ends and feels smoother against skin.