9 Mini Embroidery Motifs for Small Hoops, Collars, and Pockets
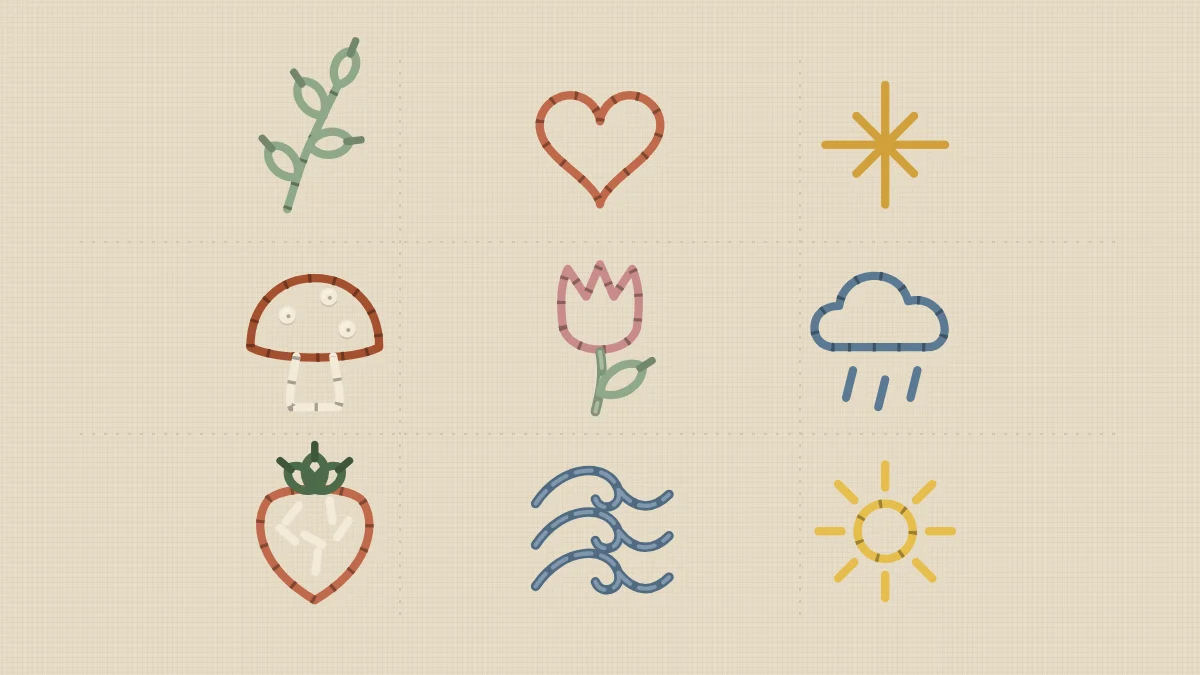
Nine original thumbnail motifs, each about 1 inch across and stitched with two strands: a leaf sprig, heart, star, mushroom, tulip, cloud, strawberry, wave and little sun.
Tutorial at a glance
Materials
- 3-inch (7.5 cm) embroidery hoop (optional on stiff fabric)
- Fabric, anything from linen to denim
- Six-strand cotton floss in sage green, deep green, terracotta, rust, mustard, golden yellow, dusty rose, slate blue and cream
- Embroidery needle with a sharp point
- Water-soluble pen or water-soluble stabilizer
- Small sharp scissors
Each of these nine motifs is about 1 in (2.5 cm) across, uses two strands of floss and takes somewhere between ten minutes and half an hour to stitch. That makes them useful in two ways: as quick practice for a single stitch, and as ready-made decorations for a collar point, a pocket edge, a napkin corner or a tiny hoop. Pick one, or stitch the whole sheet as a sampler.
The set is easy throughout. Nothing here needs more than backstitch, stem stitch, straight stitch, lazy daisy, seed stitch and the French knot, and no motif uses more than three colors.
What You Need
- A 3-inch (7.5 cm) embroidery hoop for single motifs, or no hoop at all on stiff fabric such as denim or canvas
- Fabric: anything from linen to denim
- Six-strand cotton floss in sage green, deep green, terracotta, rust, mustard, golden yellow, dusty rose, slate blue and cream
- An embroidery needle with a sharp point
- A water-soluble pen, or water-soluble stabilizer for dark or thick fabric
- Small sharp scissors
You only need the colors for the motifs you plan to stitch. A single skein of each is far more than enough.
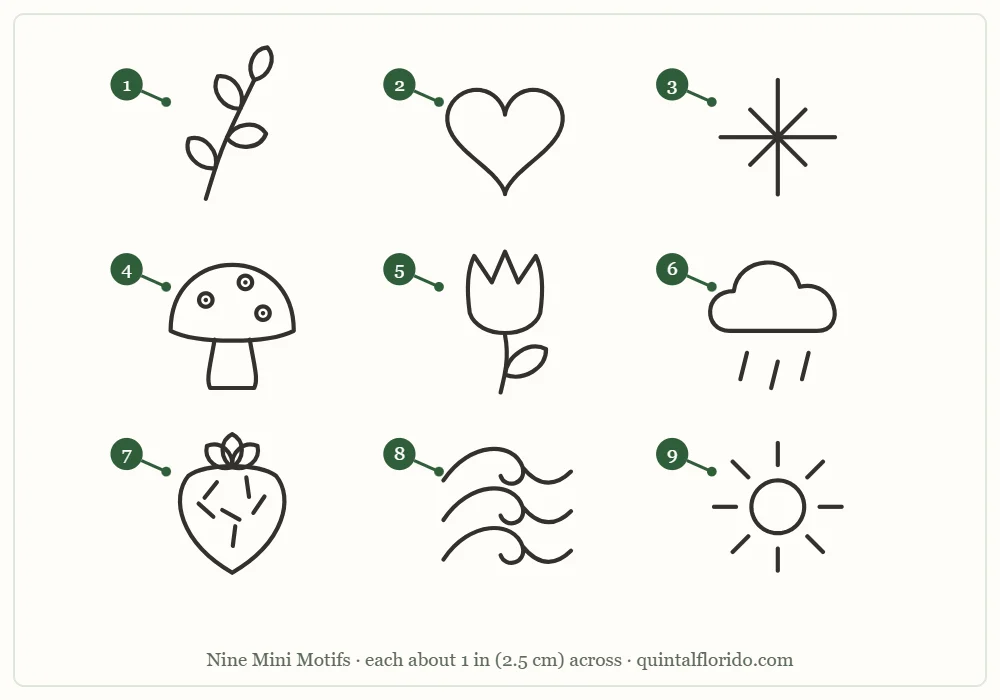
Print the sheet or trace the motif you want straight from the screen. Scale it to suit the spot: slightly smaller for a collar, larger for the center of a 3-inch hoop. Below about 3/4 in (2 cm) the details of the mushroom and strawberry become hard to stitch, so keep those two near full size.
Stitch and Color Key
Every motif is stitched with 2 strands.
| Part | Motif | Stitch | Color | Strands |
|---|---|---|---|---|
| 1 | Leaf sprig | Backstitch stem, lazy daisy leaves | Sage green | 2 |
| 2 | Heart | Backstitch outline | Terracotta | 2 |
| 3 | Star | Straight stitches crossing at the center | Mustard | 2 |
| 4 | Mushroom | Backstitch outline, French knot spots on the cap | Rust cap, cream stalk and spots | 2 |
| 5 | Tulip | Backstitch flower, stem stitch stem, one lazy daisy leaf | Dusty rose and sage green | 2 |
| 6 | Cloud with raindrops | Backstitch cloud, straight stitch drops | Slate blue | 2 |
| 7 | Strawberry | Backstitch outline, seed stitch pips, lazy daisy leaves on top | Terracotta, cream pips, deep green | 2 |
| 8 | Wave | Stem stitch, three stacked curls | Slate blue | 2 |
| 9 | Little sun | Backstitch circle, straight stitch rays | Golden yellow | 2 |
All of these stitches except seed stitch are taught in the guide to basic embroidery stitches. Seed stitch is a scatter of very small straight stitches.
Transferring the Design
On light, thin fabric, trace the motif against a window with a water-soluble pen. On denim, dark colors or anything you cannot see through, trace it onto a small piece of water-soluble stabilizer, stick or baste it in place, stitch through it and rinse it away afterward. Both methods are explained in how to transfer embroidery patterns.
Tip
At this scale, shorten everything. Backstitches of about 1/16 to 1/8 in (2 to 3 mm) keep small curves round, and a pen line that is too thick can hide exactly where the needle should go.
Stitching the Motifs
The motifs are independent, so stitch them in any order. Within each one, follow the order given here.
- Motif 1, leaf sprig. Backstitch the stem in sage green from the base to the tip. Add each leaf as a lazy daisy: come up at the stem, go down in the same hole leaving a loop, come up at the leaf tip inside the loop and anchor it with a tiny stitch over the loop. Keep the loops relaxed so the leaves stay plump.
- Motif 2, heart. Backstitch the outline in terracotta. Start at the dip at the top and finish at the point at the bottom, then repeat on the other side, so both halves are stitched in the same direction and match.
- Motif 3, star. In mustard, make straight stitches that all cross at one center point. Mark that point with a dot first and pass each stitch directly over it.
- Motif 4, mushroom. Backstitch the cap outline in rust and the stalk in cream. Then add the spots on the cap as cream French knots: wrap the thread twice and take the needle down right next to the hole it came up from, not into it.
- Motif 5, tulip. Backstitch the flower in dusty rose. Work the stem in stem stitch in sage green, starting at the bottom and keeping the working thread on the same side of the needle all the way up. Finish with one lazy daisy leaf on the stem.
- Motif 6, cloud with raindrops. Backstitch the cloud in slate blue with a stitch ending in each dip between the bumps. Add each raindrop as a single short straight stitch, all slanted the same way.
- Motif 7, strawberry. Backstitch the outline in terracotta. Scatter cream seed stitches inside for the pips, each one tiny and pointing roughly downward. Top it with lazy daisy leaves in deep green, fanning out from the center of the top edge.
- Motif 8, wave. Work the three stacked curls in stem stitch in slate blue. Make the stitches very short where each curl tightens, and end the line at the center of the curl.
- Motif 9, little sun. Backstitch the circle in golden yellow, then add the rays as straight stitches pointing away from the center. Leave a small gap between the circle and each ray.
Common Problems and Fixes
Small circles and curves look angular
The stitches are too long for the size. On the sun, the cloud and the heart, aim for at least twelve stitches around a full curve of this size.
Lazy daisy leaves look thin and tight
The loop was pulled too hard before it was anchored. Stop pulling as soon as the loop lies flat against the fabric, then make the anchoring stitch.
The fabric puckers around the motif
This usually happens when stitching without a hoop on fabric that is too soft. Use the hoop, or add a piece of stabilizer behind the area.
Watch out
On clothing, the back of the motif gets rubbed and washed. Skip bulky knots, weave each thread end under several stitches on the back, and trim close. Stretch fabrics need a stabilizer; see how to embroider on clothing before you start on a T-shirt.
Variations and Where to Use Them
- Collars and cuffs. The star, heart and leaf sprig are the simplest shapes and hold up best at the smallest sizes.
- Pockets. Sit the mushroom, tulip or strawberry just above the pocket edge so it looks as if it is peeking out.
- A row. Repeat one motif in a line, such as three waves or five stars, to make a border along a hem or a tea towel.
- A nine-patch sampler. Stitch the whole sheet as drawn on natural linen in a square frame or a 6-inch (15 cm) hoop.
- One color. Stitch all nine in a single shade, such as slate blue on white, for a quieter set.
- Go bigger. If you enjoy motif 1, the easy leaf sprig pattern is a full hoop design built on the same idea.
Finishing
Rinse away pen marks or stabilizer in cool water and let the piece dry flat, then press it face down on a folded towel. A single motif centered in a 3-inch hoop makes a small ornament or gift; close the back as shown in how to finish an embroidery hoop. On garments, press from the inside and wash them inside out.
Frequently asked questions
How big are the mini motifs?
Each one is drawn to be about 1 in (2.5 cm) across. You can scale them a little smaller for collars, but the mushroom and strawberry are best kept near full size.
How many strands of floss do the motifs use?
All nine motifs are stitched with 2 strands. That gives a line that is clear at a small scale without filling in the details.
Can I stitch small motifs without a hoop?
Yes, on stiff fabric such as denim or canvas. On softer fabric, use a small hoop or add stabilizer behind the area so the stitches do not pucker.
Which motif should a beginner start with?
The star, the heart and the leaf sprig are the simplest. Each uses one color and one or two stitches.